- 01: Why Use the Trex Hideaway Butt Joint Clip? →
- 02: How to Install a Butt Joint with the Trex Hideaway Butt Joint Clip →
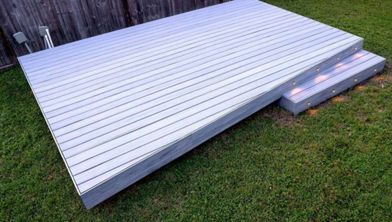
A butt joint (also known as a butt seam) refers to where two deck boards meet end to end over a single joist. Butt joints can be used on most decks, and are often used as a simpler alternative to a breaker board.
Traditionally, installing a butt joint requires extra blocking and four fasteners for a secure connection. These extra steps add time to your project and add to your material costs, especially if your project requires a large number of butt joints. Often, proper care is not taken to ensure butt joints are installed correctly, which can result in boards lifting up over time, detracting from the look of the deck and creating a safety hazard.

The Trex Hideaway Butt Joint Clip is uniquely designed for installing butt joints and offers innovations to reduce the labor and materials needed to fasten a butt joint securely. Each butt joint clip features an extra long center connection piece, also known as its "wings," to engage the grooved edge of the deck boards. This means only one Butt Joint Clip is required per side. Plus, the clip extends out on either side of your joist, using "shoulders" to provide additional support, eliminating the need for extra blocking.
Now that you know how the clip works, let's dive into how to install a butt joint with the Trex Hideaway Butt Joint Clip.
Step 1: Place the First Clip
Place the first Butt Joint Clip over the open single joist and slide it firmly into the grooved edge of the adjacent deck board.
Step 2: Install the First Clip
Using a T15 drive bit (provided), install the screws on each side of the clip into the joist. Be careful not to over drive the screws into the clip.
Step 3: Trim the Deck Board Ends
Each of your boards may have slightly different ends when you purchase them. Using a circular, miter, trim factory ends of boards, up to 3/16". This ensures a uniform butt joint. Take a moment to test the two ends of your boards against each other for a clean fit.
Step 4: Confirm Span
Deck boards must span a minimum of three joists. Make sure each of your boards is the right length before placing them on your clips.
Step 5: Place the Deck Boards
Center the two board ends over the joist, following the end-to-end or butt joint gapping recommendations in the Trex installation guide. Then push both boards firmly onto the Butt Joint Clip so that the open wing of the clip is fully seated in the grooved edge of both boards.
Step 6: Place and Install the Second Clip
Place the second Butt Joint Clip over the joist and slide it firmly into the grooved edge of the previously placed boards. Using a T15 drive bit, install the screws on each side of the clip into the joist. Be careful not to over drive the screws into the clip.
You're now ready for the next deck board. For help fastening your deck boards, explore our guide How to Fasten Trex Enhance® Decking.

This content was partially or fully generated by AI and has been reviewed by our team to ensure accuracy and relevance.


Copyright © 2026 Trex Company, Inc. All rights reserved.
Photos and videos © 2026 Warner Bros. Discovery, Inc. or its subsidiaries and affiliates. All trademarks are the property of their respective owners. All rights reserved.
- Country
-
Australia
-
Austria
-
Bahrain
-
Brazil
-
Canada English
-
-
Chile
-
Colombia
-
Costa Rica
-
Cyprus
-
Czech Republic
-
Fiji
-
France
-
Germany
-
India
-
Ireland
-
Israel
-
Kuwait
-
 Lithuania
-
Mexico
-
Netherlands
-
New Zealand
-
Norway
-
Oman
-
Qatar
-
Saudi Arabia
-
South Africa
-
Spain
-
Sweden
-
Switzerland
-
Turkey
-
United Arab Emirates
-
United Kingdom
-
United States
-
Venezuela
By choosing your country, you acknowledge that you have read Trex's Privacy Policy